
Executing a professional ute cab sunshade visor restoration is one of the most rewarding mechanical and cosmetic projects you can undertake when reviving an older 4×4, vintage utility vehicle, or classic workhorse. Over decades of exposure to harsh outback ultraviolet radiation, highway stone chips, and severe thermal cycling, factory exterior sunshades become yellowed, brittle, and structurally fatigued. Undertaking a comprehensive ute cab sunshade visor restoration breathes new life into your vehicle’s roofline, eliminating blinding glare, stopping irritating panel rattles, and restoring that timeless expedition-ready stance.
For vintage touring enthusiasts, restorers, and 4WD DIYers, failing to follow structured refurbishment protocols during a ute cab sunshade visor restoration can lead to cracked acrylic shields, stripped pillar threads, or cabin water leaks during heavy storms. Because exterior visors encounter continuous aerodynamic lift at highway velocities, pairing a rejuvenated or newly cast shield with marine-grade stainless steel hardware and fresh EPDM rubber isolation gaskets is mandatory. Whether you are restoring a classic LandCruiser, Patrol, Hilux, or Courier, mastering every phase of a ute cab sunshade visor restoration project guarantees your rig looks immaculate and remains 100% weatherproof.
In this technical guide, we break down the 7 easy steps required for a complete ute cab sunshade visor restoration. From unmounting weathered panels and sanding out surface crazing to polishing optical acrylic, sealing A-pillar mounting points, and torquing fresh hardware, this guide provides the ultimate engineering blueprint for your vehicle.
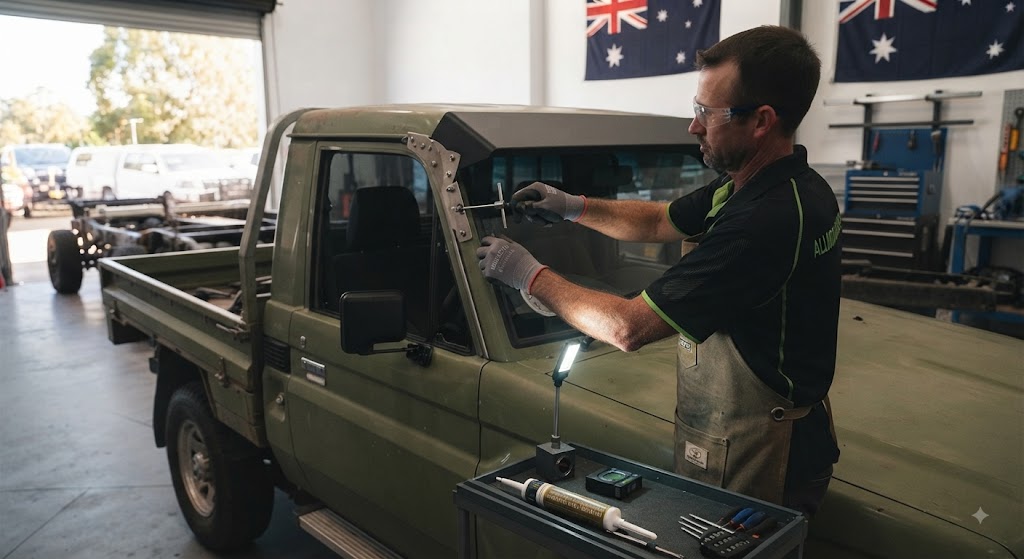
Understanding the aerodynamic loads and roof pillar mechanical forces involved in a ute cab sunshade visor restoration is essential to preventing panel fatigue or cabin water leaks.
          [ Aerodynamic & Mechanical Architecture of Ute Cab Sunshade Visor Restoration ]
                                             │
  ┌──────────────────────────────────────────┴──────────────────────────────────────────┐
  ▼                                                                                     ▼
[ Restored Optical Cast Acrylic Shield ]                                [ A-Pillar Structural Mounting Bracket Matrix ]
• Wet-sanded (800 to 2500 grit) and compound polished                   • Refurbished 304 stainless steel side mounting brackets
• Tapered lead edge channels airflow upwards over cab roof              • Stainless steel blind rivets or threaded nutserts
• Protected with UV-inhibiting ceramic or acrylic sealant                • Neutral-cure polyurethane sealant seals all pillar drill holes
• Dampened by continuous stainless or powder-coated frames               • Heavy EPDM rubber isolation pads prevent paint chafing
When traveling at highway speeds, a restored exterior visor encounters continuous air resistance that exerts uplifting and downward pressure on its mounting hardware. A successful ute cab sunshade visor restoration relies on inspecting and straightening stainless steel side brackets fastened securely into the A-pillar door jambs or outer cab roof channels. Distributing these clamping forces evenly across multiple fastener points during your ute cab sunshade visor restoration project prevents localized sheet metal stretching or fatigue cracks around drill holes.
Furthermore, applying a neutral-cure marine polyurethane sealant (such as Sikaflex-221 or 291) inside every drilled pilot hole before driving fasteners home is a critical phase of any ute cab sunshade visor restoration procedure. Because the vehicle’s A-pillar houses internal structural box sections, preventing water ingress during heavy downpours or high-pressure car washes guarantees that your ute cab sunshade visor restoration will never cause internal roof pillar rust or headliner dampness.
Reviving an aging exterior sunshade requires methodical unmounting, surface resurfacing, hardware replacement, and sealing procedures. Here are the 7 fundamental operational stages to complete during your ute cab sunshade visor restoration:
Carefully loosen and remove all button-head screws, side brackets, and center stays to detach the weathered shield without damaging your vehicle’s painted cab roof during your ute cab sunshade visor restoration.
Inspect the removed visor for deep structural cracks or severe UV crazing. If structural integrity is compromised, substitute a new 4.5mm cast acrylic panel as part of your ute cab sunshade visor restoration.
Wet-sand yellowed or hazy acrylic surfaces starting with 800-grit waterproof sandpaper, progressing through 1200, 1500, and 2000 grit to smooth out blemishes during your ute cab sunshade visor restoration.
Apply a heavy-cut plastic polishing compound using a variable-speed rotary buffer fitted with a foam wool pad, finishing with an optical polish to restore crystal transparency for your ute cab sunshade visor restoration.
Strip rust from steel side brackets using a wire wheel, treat with a rust-inhibiting primer, and finish with a durable satin black or powder-coat layer during your ute cab sunshade visor restoration.
Discard old, compressed foam pads and install fresh EPDM rubber isolation gaskets. Inject neutral-cure marine polyurethane sealant into all pillar drill holes during your ute cab sunshade visor restoration.
Mount the restored visor assembly using fresh stainless steel screws and nylon-insert locknuts. Torque all hardware to manufacturer limits to finalize your ute cab sunshade visor restoration.
Evaluating physical properties helps builders select the correct shield style and bracket layout for their ute cab sunshade visor restoration:
| Specification / Feature | Optical Cast Acrylic Visor | High-Impact Polycarbonate Visor | Molded Fibreglass Cab Visor | Stainless Steel Mesh Shade |
|---|---|---|---|---|
| Material Thickness | 4.0mm – 5.0mm Cast Acrylic | 3.5mm – 4.5mm Polycarbonate | 3.0mm Reinforced GRP | 1.5mm Woven Stainless Wire |
| UV Resistance Rating | Exceptional (Will Not Yellow) | Moderate (Requires UV Coating) | High (Painted Gelcoat Finish) | Impervious to UV Rays |
| Average Assembly Weight | 2.5 kg – 4.2 kg complete | 2.2 kg – 3.8 kg complete | 4.5 kg – 7.0 kg complete | 3.0 kg – 5.0 kg complete |
| Wind Drag Coefficient | Low (Tapered Airflow Curve) | Low (Tapered Airflow Curve) | Moderate (Solid Front Lip) | High (Mesh Surface Drag) |
| Glare Reduction Efficiency | 85% – 95% Light Filtered | 80% – 90% Light Filtered | 100% Solid Shade Block | 60% – 75% Light Filtered |
| Waterline Ingress Risk | Zero (When Correctly Sealed) | Zero (When Correctly Sealed) | Zero (When Correctly Sealed) | Zero (When Correctly Sealed) |
| Offroad Vibration Rating | High (With Center Stay) | High (With Center Stay) | Moderate (Heavy Rigid Body) | Moderate (Frame Flexing) |
Selecting high-quality material components determines how your ute cab sunshade visor restoration performs under extreme heat, freezing temperatures, and heavy wind buffeting.
         [ Material Engineering for Ute Cab Sunshade Visor Restoration ]
                                     │
  ┌──────────────────────────────────┴──────────────────────────────────┐
  ▼                                                                     ▼
[ Restored Cast Acrylic Sheet (PMMA) ]                  [ Stainless Steel (304/316 Grade) Bracketry ]
• High-grade optical polymer resurfaced via wet-sanding                 • Yield strength resists high-speed wind deflection forces
• Ceramic topcoat seals microscopic pores against future UV hazing      • Powder-coated or polished finish resists coastal salt spray
• Rigid structural memory maintains aerodynamic contour                 • Rigid mounting geometry keeps visor aligned across corrugated tracks
• Retains deep smoke tint or optical clarity without warping             • Fitted with EPDM rubber buffers to protect factory vehicle paint
Restoring original 4.5mm optical-grade cast acrylic (Polymethyl Methacrylate) during a ute cab sunshade visor restoration preserves authentic vehicle styling while removing years of oxidation. Unlike cheaper extruded plastics that crack when polished, cast acrylic responds exceptionally well to progressive wet-sanding and compound buffing, regaining its original deep smoke tint and optical clarity.
Pairing your restored shield with newly galvanized or 304-grade stainless steel mounting brackets is essential for a successful ute cab sunshade visor restoration. Stainless steel hardware resists rusting from trapped rain moisture and road salt, ensuring your restored visor remains solidly mounted across thousands of kilometers of rough outback tracks.
Every completed ute cab sunshade visor restoration must satisfy national transport regulations. In Australia, exterior vehicle body attachments are regulated by standards published by the Federal Register of Legislation under Australian Design Rules ADR 12/00 (Glare Reduction in Field of View) and ADR 42/00 (General Safety Requirements).
                  [ ADR Safety Compliance Criteria ]
                                    │
   ┌────────────────────────────────┼────────────────────────────────┐
   ▼                                ▼                                ▼
[ Forward Field of View Standards ] [ Maximum Vehicle Projection ]   [ Edge Radius & Safety Rules ]
• Must not obscure driver view    • Must not extend beyond the      • All exposed bracket edges
  of traffic control signals        outer width of door mirrors       must have minimum 2.5mm radius
Maintaining your restored visor after completing a ute cab sunshade visor restoration preserves optical transparency and prevents future oxidation.