
Choosing the right mounting architecture when fitting an exterior shade canopy comes down to a critical debate in the 4×4 community: sun visor drill vs no drill mount systems. Whether you are outfitting a rugged Toyota LandCruiser, a Ford Ranger, or an Isuzu D-Max for outback touring, deciding between a mechanical drill-in bracket setup or an adhesive/clamp-on non-drill configuration determines how well your visor withstands highway speed wind lift, severe corrugated tracks, and heavy weather. While non-drill brackets promise quick installation without piercing sheet metal, drill-in mounts provide unmatched structural rigidity for heavy-duty commercial workhorses and serious 4WD expedition rigs.
However, evaluating the sun visor drill vs no drill mount trade-offs without understanding installation engineering often leads to costly errors. Failing to use structural fasteners on drill mounts can result in high-speed panel peel-back, while relying on cheap automotive tape for a non-drill visor on corrugated red dirt frequently ends in lost shields on the highway. Furthermore, whether you choose a drill or no-drill approach, failing to seal mounting points, ignoring paint protection gaskets, or overloading weight capacities will compromise your vehicle’s roofline integrity.
In this comprehensive technical guide, we analyze the sun visor drill vs no drill mount comparison and highlight 6 deadly mistakes every builder must avoid. From assessing aerodynamic loads and bracket tensile strength to applying neutral-cure polyurethane sealants, EPDM rubber isolation pads, and transport compliance checks, this guide provides the ultimate engineering blueprint for your vehicle.
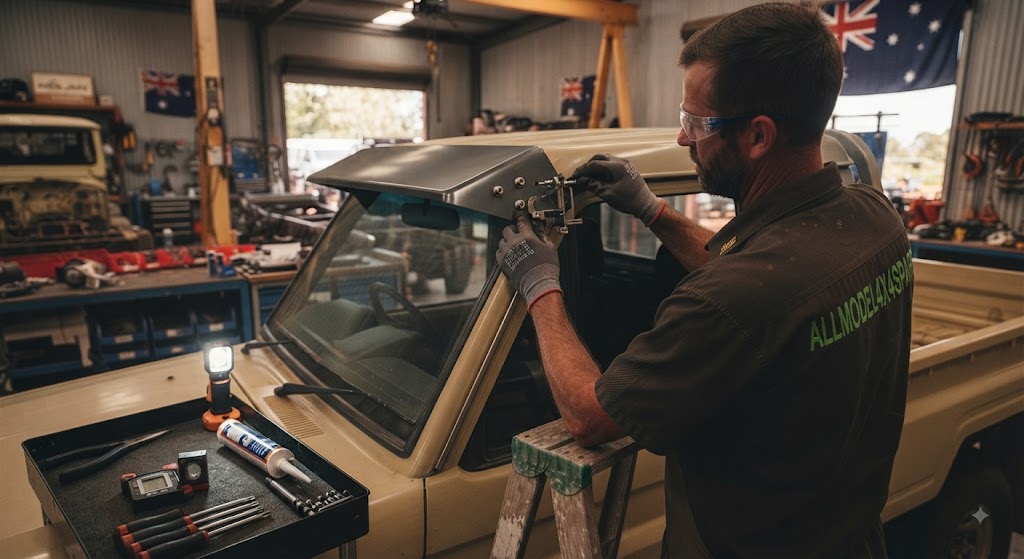
Understanding the aerodynamic loads and roof pillar mechanical forces involved in a sun visor drill vs no drill mount evaluation is essential to preventing panel fatigue or cabin water leaks.
         [ Aerodynamic & Mechanical Architecture of Sun Visor Drill vs No Drill Mount ]
                                             │
  ┌──────────────────────────────────────────┴──────────────────────────────────────────┐
  ▼                                                                                     ▼
[ Drill-In Mounting Architecture ]                                      [ No-Drill Clamp & Adhesive Architecture ]
• Bolted via stainless rivets or nutserts into A-pillars                 • Clamped over door returns or secured with 3M VHB tape
• High tensile load capacity for severe corrugated tracks               • Zero sheet metal penetration or rust risk
• Requires neutral-cure polyurethane sealant in all pilot holes         • Requires strict surface temperature curing protocols
• Rigid stainless steel brackets eliminate high-speed flutter           • Best suited for light acrylic visors and urban touring
When traveling at highway speeds, an exterior cab visor encounters continuous air resistance that exerts uplifting and downward pressure on its mounting hardware. A successful sun visor drill vs no drill mount decision depends entirely on your intended driving conditions. While a drill-in mounting system distributes clamping forces mechanically through structural pillar steel—making it ideal for rugged outback touring—a no-drill clamp system relies on high-bond adhesive or door-jamb pressure lips, which are better suited for light-duty urban utility vehicles.
Furthermore, whether executing a drill-in or no-drill installation, applying proper sealing and isolation protocols is non-negotiable. For drilled setups, injecting neutral-cure marine polyurethane sealant (such as Sikaflex-221 or 291) inside every drilled pilot hole prevents internal A-pillar rust. For non-drill setups, thoroughly degreasing door channels with isopropyl alcohol and applying automotive adhesion promoters guarantees your mounting brackets will never shear off under high-speed wind buffeting.
Navigating the sun visor drill vs no drill mount decision requires strict adherence to engineering best practices. Here are the 6 deadly mistakes you must avoid during your installation:
Relying exclusively on a tape-secured no-drill bracket when tackling corrugated outback tracks is a major mistake. Heavy washboard vibrations break down adhesive bonds over time; serious touring builds requiring high-impact acrylic or composite visors demand a secure drill-in mount.
Failing to inject neutral-cure polyurethane sealant into drilled A-pillar pilot holes during a drill installation allows rainwater to migrate into internal box sections, causing hidden pillar rust and ruined headliners.
Mounting metal brackets directly against factory painted sheet metal without EPDM rubber isolation pads causes paint chafing, galvanic corrosion, and vibration stress fractures regardless of whether you choose a drill or no-drill setup.
Underestimating the upward aerodynamic drag generated at 110 km/h highway speeds can cause lightweight non-drill clamps to lift or snap. Always ensure your setup includes a sturdy central windstay to stabilize the shield.
Attempting a no-drill tape or clamp installation on unwashed, waxy cab paint will result in immediate failure. You must scrub bonding zones with isopropyl alcohol and apply a dedicated adhesion promoter.
Mounting an exterior visor too low into the primary wiper sweep zone or allowing brackets to project past side-view mirror boundaries violates Australian Design Rules (ADR), risking fines or roadworthy failure.
Evaluating physical properties helps builders select the correct shield style and bracket layout for their sun visor drill vs no drill mount comparison:
| Specification / Feature | Optical Cast Acrylic Visor | High-Impact Polycarbonate Visor | Molded Fibreglass Cab Visor | Stainless Steel Mesh Shade |
| Material Thickness | 4.0mm – 5.0mm Cast Acrylic | 3.5mm – 4.5mm Polycarbonate | 3.0mm Reinforced GRP | 1.5mm Woven Stainless Wire |
| UV Resistance Rating | Exceptional (Will Not Yellow) | Moderate (Requires UV Coating) | High (Painted Gelcoat Finish) | Impervious to UV Rays |
| Average Assembly Weight | 2.5 kg – 4.2 kg complete | 2.2 kg – 3.8 kg complete | 4.5 kg – 7.0 kg complete | 3.0 kg – 5.0 kg complete |
| Wind Drag Coefficient | Low (Tapered Airflow Curve) | Low (Tapered Airflow Curve) | Moderate (Solid Front Lip) | High (Mesh Surface Drag) |
| Glare Reduction Efficiency | 85% – 95% Light Filtered | 80% – 90% Light Filtered | 100% Solid Shade Block | 60% – 75% Light Filtered |
| Waterline Ingress Risk | Zero (When Correctly Sealed) | Zero (When Correctly Sealed) | Zero (When Correctly Sealed) | Zero (When Correctly Sealed) |
| Offroad Vibration Rating | High (With Center Stay) | High (With Center Stay) | Moderate (Heavy Rigid Body) | Moderate (Frame Flexing) |
Selecting high-quality material components determines how your sun visor drill vs no drill mount configuration performs under extreme heat, freezing temperatures, and heavy wind buffeting.
         [ Material Engineering for Sun Visor Drill vs No Drill Mount Systems ]
                                     │
  ┌──────────────────────────────────┴──────────────────────────────────┐
  ▼                                                                     ▼
[ Drill-In Stainless Steel Bracketry ]                  [ No-Drill High-Bond Clamp Systems ]
• High tensile yield strength resists extreme wind shear                • Non-invasive clamping lips avoid sheet metal holes
• Fastened securely with stainless blind rivets or nutserts             • Bonded with industrial-strength 3M VHB acrylic foam tape
• Coupled with EPDM rubber pads to stop galvanic corrosion              • Requires strict surface temperature curing (above 20°C)
• Engineered for heavy touring across corrugated outback tracks         • Ideal for leased work vehicles or light urban utility builds
For uncompromising offroad strength, drill-in hardware utilizing 304 or 316-grade stainless steel brackets and blind rivets provides the highest level of mechanical security. When comparing a sun visor drill vs no drill mount setup for remote outback expedition vehicles, mechanical bolting ensures the visor cannot be ripped off by low-hanging tree branches or severe head-winds.
For builders who prefer not to pierce their vehicle’s body panels, no-drill clamps utilize door-jamb return lips or industrial 3M VHB (Very High Bond) acrylic foam tape. When installed in optimal temperature conditions with proper surface priming, no-drill mounts offer clean aesthetics and zero risk of pillar water leaks, making them popular for city-driven commercial utes.
explore our complete range of 4x4 armor, side steps, and rock sliders
Every completed visor installation—whether utilizing a sun visor drill vs no drill mount configuration—must satisfy national transport regulations. In Australia, exterior vehicle body attachments are regulated by standards published by the Federal Register of Legislation under Australian Design Rules ADR 12/00 (Glare Reduction in Field of View) and ADR 42/00 (General Safety Requirements).
                  [ ADR Safety Compliance Criteria ]
                                    │
   ┌────────────────────────────────┼────────────────────────────────┐
   ▼                                ▼                                ▼
[ Forward Field of View Standards ] [ Maximum Vehicle Projection ]   [ Edge Radius & Safety Rules ]
• Must not obscure driver view    • Must not extend beyond the      • All exposed bracket edges
  of traffic control signals        outer width of door mirrors       must have minimum 2.5mm radius
Maintaining your mounting hardware and exterior visor after completing a sun visor drill vs no drill mount installation preserves structural integrity and prevents failure.