
Installing a high-performance heavy duty ute sunvisor is widely recognized by commercial fleet operators, tradespeople, and four-wheel drive touring enthusiasts as one of the most practical exterior modifications available. When spending long hours behind the wheel of a utility vehicle or commercial transport van, harsh solar glare coming over the upper edge of the windshield causes significant eye strain, headache risks, and driver fatigue. Fitting a dedicated heavy duty ute sunvisor establishes an extended overhead shield that blocks intense direct sunlight long before glare reaches the driver’s eyes.
Beyond improving visual clarity on highway runs, a quality heavy duty ute sunvisor delivers immediate thermal insulation advantages for the vehicle cabin. By keeping the top section of the windshield glass in permanent shadow, an exterior shade significantly reduces interior heat accumulation during peak afternoon sun exposure. Stopping shortwave solar radiation outside the glass prevents dark vinyl dashboards, steering wheels, and seats from absorbing thermal energy. This physical barrier lowers cabin temperatures, allowing the vehicle’s air conditioning system to operate efficiently while minimizing fuel consumption on long highway routes.
However, choosing and installing an aftermarket shade on a working vehicle requires careful consideration of structural materials, mounting options, and aerodynamic performance. Unlike minor interior accessories, an exterior heavy duty ute sunvisor must withstand strong headwind resistance at highway speeds, continuous corrugation vibration on unpaved gravel roads, and harsh weather exposure. Proper mounting using marine-grade hardware, rubber isolation gaskets, and polyurethane sealants is essential to avoid body rust, roof leaks, or cabin wind chatter.
This comprehensive guide covers everything you need to know about selecting, installing, maintaining, and legally operating a heavy duty ute sunvisor on commercial vans, working utes, and off-road 4WD rigs.
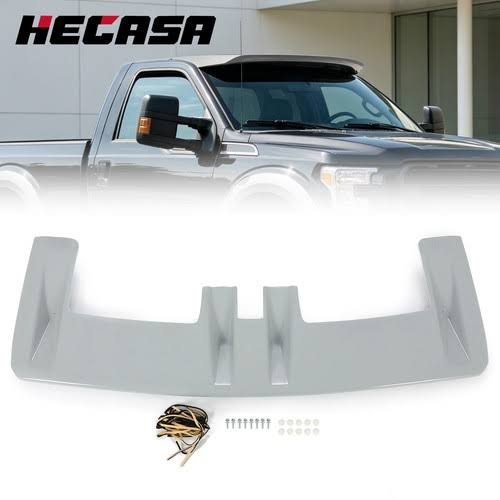
To understand why a heavy duty ute sunvisor is an essential upgrade for working vehicles, it helps to examine how solar energy interacts with automotive glass. Standard laminated windshields allow shortwave solar light to pass directly into the vehicle interior. When this light strikes dark internal surfaces, it transforms into longwave infrared heat energy that becomes trapped within the cab.
A front-mounted heavy duty ute sunvisor stops this process before solar energy reaches the glass. By shading the top portion of the windscreen frame, interior temperatures stay noticeably cooler during daytime driving or static parking.
                      [ Solar Radiation Behavior Comparison ]
                                         │
        ┌────────────────────────────────┴────────────────────────────────┐
        ▼                                                                 ▼
[ Without Exterior Sunvisor ]                                    [ With Heavy Duty Ute Sunvisor ]
• Direct solar light strikes windshield glass                  • Rays hit tough exterior visor shield
• Shortwave UV light penetrates glass pane                     • Thermal energy reflects back into ambient air
• Dark vinyl dash absorbs heat energy                          • Upper glass stays in continuous shadow
• Trapped heat spikes interior cabin temp                      • Dashboard surface temperatures drop up to 15°C
• Air conditioning runs at maximum load                        • Reduced AC strain preserves engine efficiency
Selecting the optimal heavy duty ute sunvisor depends on your vehicle’s operating environment, payload needs, and aesthetic preferences. Manufacturers construct exterior visors from three primary materials, each presenting distinct physical characteristics.
                  [ Visor Material Selection Guide ]
                                  │
  ┌───────────────────────────────┼───────────────────────────────┐
  ▼                               ▼                               ▼
[ Dark Smoke Acrylic ]         [ Molded Fiberglass ]          [ Press-Formed Steel/Alloy ]
• Optical semi-transparency    • 100% opaque solar block      • Extreme impact resistance
• Ready to fit out of box      • Ready for custom color match • Fleet & agricultural focus
• Flexes under wind load       • Easily repaired on site      • Heavy structural build
Dark smoke acrylic is a highly popular option for a heavy duty ute sunvisor due to its sleek look and optical transparency. High-grade acrylic visors function like oversized sunglasses fitted above the windscreen header.
A fiberglass heavy duty ute sunvisor is favored by commercial operators seeking maximum structural rigidity, complete light blockage, and a custom color-matched appearance.
Constructed mainly for heavy agricultural machinery, mining fleets, and commercial vans, metal visors provide high impact resistance against falling debris and heavy stones. However, a metal heavy duty ute sunvisor adds weight to the cab roofline and requires anti-corrosion paint coatings along sheet metal edges.
Reviewing structural performance metrics helps fleet owners identify the right heavy duty ute sunvisor for their working vehicles:
| Performance Metric | Dark Smoke Acrylic | Molded Fiberglass (FRP) | Fabricated Metal / Alloy |
| Light Transmission | Semi-transparent smoke | 100% Opaque (Solid shade) | 100% Opaque (Solid shade) |
| UV Solar Filtering | Blocks 85%+ UV light | Blocks 100% direct light | Blocks 100% direct light |
| Paint Customization | Pre-finished glossy tint | Requires custom body paint | Requires powder-coat paint |
| Structural Flexibility | Moderate elastic flex | Rigid composite structure | Rigid sheet structure |
| Impact Resistance | Good for highway use | High (Easily repaired) | Maximum impact resistance |
| Weight on Roofline | Lightweight (~2.5 kg) | Medium weight (~3.8 kg) | Heavy weight (~5.5+ kg) |
| Vibration Damping | Absorbs high-speed flex | Needs rubber pad isolation | Needs heavy bracket mounts |
| Average Kit Price | $240 – $380 AUD | $350 – $580 AUD (+ paint) | $450 – $700 AUD |
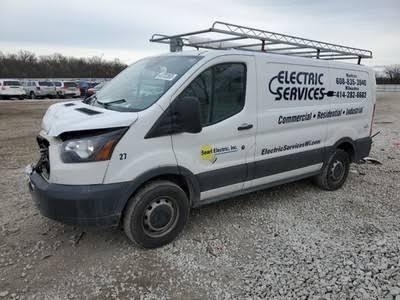
Because utility vehicles and commercial vans have broad, upright front profiles, mounting an exterior heavy duty ute sunvisor introduces an additional surface into incoming high-speed airflow. At highway speeds between 100 km/h and 110 km/h, unvented visors can trap air underneath, generating high-pressure pockets that cause lift, vibration, and unwanted cabin noise.
                 [ Aerodynamic Airflow Dynamics Comparison ]
                                     │
  ┌──────────────────────────────────┴──────────────────────────────────┐
  ▼                                                                     ▼
[ Solid Flat Visor Profile ]                       [ Sculpted Vented Visor Design ]
• Air traps beneath the visor brow                 • Incoming air flows into front relief slots
• Creates upward lift force on mounting feet       • High-velocity air exhausts across roofline
• Causes vibration at high highway speeds          • Equalizes air pressure on bracket mounts
• Increases wind noise inside driver cab           • Eliminates wind noise and roof chatter
To eliminate drag and vibration, engineered heavy duty ute sunvisor designs feature central pressure relief slots, raised scoops, or contoured channels. These relief vents allow trapped high-speed air to equalize across the roofline. Pressure venting stabilizes the visor body, lowers mechanical stress on A-pillar brackets, and keeps interior noise levels quiet during highway trips.
Proper installation of a heavy duty ute sunvisor requires specialized tools, structural inserts, and marine-grade anti-corrosion sealants to ensure a leak-proof setup:
| Tool / Component | Recommended Specification | Primary Function During Fitment |
| Rivnut Setter Tool | Heavy-duty M5 or M6 insertion tool | Installing threaded anchors into sheet metal pillars |
| Stainless Fasteners | 316 Marine-grade stainless steel bolts | Securing brackets without risk of corrosion |
| Polyurethane Sealant | Sikaflex 221 or 291 marine adhesive | Sealing drilled holes to block moisture ingress |
| Zinc Primer | Cold galvanizing spray or zinc paint | Coating raw sheet metal edges against rust |
| Drill Bit & Stop | 3mm pilot bit, step bit, depth stop collar | Drilling pillar holes safely without hitting wiring |
| Isolation Gaskets | 1.5mm high-density EPDM rubber sheet | Cushioning brackets against body paintwork |
| Thread Locker | Medium-strength blue locker (Loctite 243) | Locking bolts against corrugation vibration |
| Measuring Tools | Flexible tape measure & masking tape | Marking exact centerlines and hole positions |
Follow this structured 5-stage installation method to securely fit your heavy duty ute sunvisor to any commercial van or utility vehicle cab.
                  [ 5-Stage Installation Sequence ]
                                 │
  ┌───────────────┬──────────────┼──────────────┬──────────────┐
  ▼               ▼              ▼              ▼              ▼
[ Stage 1 ]     [ Stage 2 ]    [ Stage 3 ]    [ Stage 4 ]    [ Stage 5 ]
Mark Centerline  Drill Holes    Seal & Insert  Fit Rubber     Torque Hardware
& Test Fit      with Stop      Rivnut Anchors Gasket Pads    & Test Seals
Precise measurement ensures your heavy duty ute sunvisor sits level across the roof header line and maintains visual symmetry.
Drilling sheet metal pillars requires care to prevent drill bits from plunging into internal wiring looms or structural cavities.
                 [ A-Pillar Drilling Cross-Section ]
                                  │
  ┌───────────────────────────────┼───────────────────────────────┐
  ▼                               ▼                               ▼
[ Outer Sheet Metal ]    [ Internal Air Gap ]           [ Inner Pillar / Loom ]
Drill outer skin only    Maintain 10mm drill clearance   Do NOT allow bit to contact
(approx 1.2mm steel).    using a mechanical stop collar. internal wiring bundles.
1.Mark Pilot Hole Coordinates:Accurate measuring prevents crooked bracket alignment.
With the visor held securely in place, punch guide marks through your mounting template onto the pillar masking tape. Re-verify side-to-side symmetry before drilling.
2.Drill Pillar Holes with Mechanical Depth Stops:Prevents drill bit contact with internal cab wiring.
Attach a mechanical drill stop collar set to 10mm maximum depth. Drill pilot holes with a 3mm bit, then enlarge using a step bit to match your rivnut sleeve diameter.
3.Apply Zinc Inhibitor and Polyurethane Sealant:Vital barrier against sheet metal rust and leaks.
Clean away all drill metal filings completely using a magnet. Paint raw hole edges with cold galvanizing zinc primer. Inject Sikaflex marine polyurethane sealant into each hole cavity.
4.Set Threaded Steel Rivnut Anchors:Creates a permanent, high-strength threaded mounting anchor.
Thread an M5 or M6 steel rivnut onto your insertion tool mandrel. Push the insert into the wet sealant and squeeze the tool handles to collapse the anchor sleeve inside the pillar skin.
explore our complete range of heavy duty ute sunvisors and exterior accessories
Drilling unsealed holes into vehicle sheet metal leads to hidden structural rust over time. Applying multi-stage chemical barriers ensures a leak-proof result.
                 [ Multi-Barrier Sealing Assembly ]
                                  │
  ┌───────────────────────────────┼───────────────────────────────┐
  ▼                               ▼                               ▼
[ Zinc Anti-Rust Coating ]  [ Polyurethane Sealant ]     [ Compressed EPDM Rubber ]
Protects raw drilled steel  Injected into rivnut cavity  Fills micro gaps between
edges against moisture.     to block water ingress.      bracket foot and chassis paint.
Bolting metal bracket feet directly to vehicle paintwork creates friction points that chip clear coats and invite rust beneath mounting points.
             [ Bracket Fastener Assembly Order ]
                            │
  ┌─────────────────────────┼─────────────────────────┐
  ▼                         ▼                         ▼
[ Stainless Button Bolt ] → [ Lock Washer ]        → [ Bracket Foot ]
                            │
                            ▼
[ EPDM Cushion Pad ]    → [ Polyurethane Bead ]    → [ Threaded Rivnut ]
With all hardware started, perform final visual checks before securing your heavy duty ute sunvisor permanently:
Before operating your vehicle on public roads, ensure your installed heavy duty ute sunvisor complies with national road safety regulations. In Australia, vehicle accessory standards are governed under transport guidelines available on the Federal Register of Legislation under Australian Design Rule ADR 12/00 (Driver Field of View).
                 [ Road Safety & Legal Standards ]
                                  │
  ┌───────────────────────────────┼───────────────────────────────┐
  ▼                               ▼                               ▼
[ Driver Field of View ]    [ Edge Radius Safety ]       [ Vehicle Dimensional Limits ]
Visor frame must not extend Visor & bracket edges must   Overall accessory width must
below primary wiper sweep   feature minimum 2.5mm - 5mm  stay within the outer body
zone on front glass.        rounded radius corners.      line of your vehicle cab.
Even a professionally installed heavy duty ute sunvisor requires periodic maintenance checks to handle continuous vibration on rough roads and long highway trips.
                  [ Preventative Maintenance Schedule ]
                                    │
    ┌───────────────────────────────┼───────────────────────────────┐
    ▼                               ▼                               ▼
[ Initial 100 km Check ]       [ Bi-Annual Hardware Audit ]    [ Annual Sealant Inspection ]
Re-torque all stainless bolts  Inspect rivnuts for movement;   Examine polyurethane beads
after initial highway run to   re-apply thread locker if       around brackets; touch up
settle rubber gaskets.         fasteners show looseness.       weatherproofing as needed.
New EPDM rubber cushion pads compress slightly during initial highway runs. After completing 100 km of driving with your new heavy duty ute sunvisor, re-check all mounting bolts with a hex key and tighten them back to specification.
Rough gravel roads and corrugated tracks generate continuous vibration. Inspect visor mounting brackets twice a year to confirm bolts remain tight and check visor surfaces for stress marks around mounting points.
Ensure all key steps are complete before returning your vehicle to service:
Equipping your vehicle with a quality heavy duty ute sunvisor lowers cabin temperatures, eliminates severe solar glare, and protects internal dashboard components. Following solid fitment methods—using marine-grade stainless hardware, steel rivnuts, anti-rust primers, and marine sealants—ensures your setup remains secure, silent, and waterproof across years of daily service!